

A vendor onboarding process for accounting has one job: no vendor gets paid until you have a signed Form W-9, the correct legal name and tax ID on file, a verified payment method, and that vendor properly tagged in your books. Everything else is detail. AmCFO treats onboarding as a payment gate, not paperwork, because the moment you release funds before validation, you own the tax risk. Right now, before you read another paragraph, do this:
- Pull your current vendor list and flag anyone paid in the last 30 days without a W-9 on file.
- Send a W-9 request to each one today using a standard template, not a one-off email.
- Hold any pending payment to a new vendor until that form comes back signed and matches your accounting system.
That's the entire strategy in miniature. The rest of this guide fills in exactly how.
Key Takeaways
A vendor onboarding process built as a payment gate, requiring a validated W-9 and verified banking before the first dollar moves, prevents most 1099 errors and IRS notices before they start.
| Point | Details |
|---|---|
| W-9 before payment | Collect and validate the W-9 before releasing any payment, not after. |
| Match the QuickBooks profile exactly | Enter legal name and TIN character-for-character and check "Track payments for 1099." |
| Watch entity type | Corporations are usually 1099-exempt; individuals, LLCs, and partnerships usually aren't. |
| Run TIN matching in Q4 | Bulk matching through IRS e-Services catches mismatches while there's time to fix them. |
| Get help closing the gaps | AmCFO's bookkeeping and fractional CFO services set up the controls that keep this process running. |
Table of Contents
- Step 1: Collect Vendor Identity, Contact, and a Signed W-9 at Intake
- Step 2: Validate the W-9 and Decide 1099-NEC Eligibility
- Step 3: Configure the Vendor Record in QuickBooks
- Step 4: Set Up Payment and Verify Banking Before the First Dollar Moves
- Automation Patterns Small Teams Can Adopt
- TIN Matching, B-Notices, and Year-End Prep
- Who Owns Onboarding, and How to Keep It Clean
- Why the Payment Gate Approach Actually Works
- How AmCFO Helps You Build This Into Your Books
- Resources for Implementing These Controls
- Frequently Asked Questions
- Sources
Step 1: Collect Vendor Identity, Contact, and a Signed W-9 at Intake
Every vendor record starts the same way, before a single invoice gets entered:
- Legal business name exactly as filed with the IRS.
- Taxpayer Identification Number (EIN or SSN).
- Tax classification (individual, single-member LLC, corporation, partnership).
- Mailing address, plus a contact name and email for follow-up.
- Services provided and agreed payment terms.
None of that is optional, and a completed Form W-9 is what makes items two and three trustworthy. The IRS permits electronic collection of W-9s as long as your system reasonably confirms the signer's identity and can produce a hard copy on request, which is why a secure intake form beats an email attachment sitting in someone's inbox.
Route intake through a portal or a locked-down form rather than open email threads. W-9s carry Social Security numbers for sole proprietors, so secure handling is important.
Pro Tip: Build one W-9 request template with your company logo and a clear deadline. Vendors respond faster to something that looks official than to a bare-bones email asking for "tax info."
Step 2: Validate the W-9 and Decide 1099-NEC Eligibility
A W-9 sitting in a folder unread is worse than no W-9 at all, because it creates a false sense of coverage. Check it properly before you file it anywhere.
- Confirm the form is signed and dated. An unsigned W-9 does not satisfy IRS documentation requirements.
- Confirm the TIN field is filled in completely. Nine digits, no gaps.
- Confirm the legal name on the form matches the name the TIN is registered under. Mismatches are the number one cause of downstream notices.
Entity type decides whether you'll even need a 1099. Corporations are generally exempt from 1099-NEC reporting, while individuals, sole proprietors, partnerships, and most LLCs are not. Misclassifying entity type at intake causes unnecessary forms and, just as often, confused vendors calling to ask why they received one.
Run IRS TIN Matching through IRS e-Services as soon as the W-9 lands to catch mismatches early and allow time for correction before filing deadlines.
Step 3: Configure the Vendor Record in QuickBooks
Once the W-9 checks out, the vendor profile in your accounting system should exactly match it to ensure accurate 1099 reporting.
- Enter the legal name and TIN exactly as they appear on the W-9 to ensure consistency for reporting.
- Check "Track payments for 1099" in the vendor profile. In QuickBooks Online, payments made before this box is checked may not get captured automatically in 1099-NEC reporting, and there's no clean way to retroactively backfill that.
- Tag the vendor's 1099 eligibility based on the entity type you confirmed in Step 2.
- Record remittance details, set a default expense account, and lock in payment terms.
Duplicate vendor records are the quiet killer here. "ABC Plumbing LLC" and "ABC Plumbing, LLC" look identical to a human and completely different to reporting software, splitting one vendor's payments across two records and understating what you owe them on a 1099.
Step 4: Set Up Payment and Verify Banking Before the First Dollar Moves
Payment details deserve the same scrutiny as tax documents, because a wrong routing number costs you money immediately, not just at tax time.
- Verify new bank accounts securely through micro-deposits or portal verification instead of relying on emailed account numbers.
- Cross-check a voided check against the account name on file if the vendor submits one.
- Tie the payment hold directly to document status: no signed W-9 and verified banking, no released payment, full stop.
- Designate one person, usually the AP lead or controller, with authority to release a held payment once documents clear.
Document the agreed payment terms (net 15, net 30, whatever you settled on) inside the vendor record itself, not in a side email, so the first invoice reconciles against something concrete.
Pro Tip: Reconcile the first payment to a new vendor manually, even if your system is fully automated. It's the cheapest insurance you'll ever buy against a typo in a bank account number.
Automation Patterns Small Teams Can Adopt
Manual W-9 chasing eats hours you don't have, and most of that time is spent sending the same reminder three times. A basic sequence fixes most of it: intake form creates a pending vendor record, an automated request goes out immediately with scheduled reminders, a dashboard shows status, and a completed W-9 triggers approval.
Zapier or Make handles that sequence fine for a five-person AP team. Once you're processing dozens of vendors a month, a native accounting integration that actually enforces payment holds, rather than just sending reminders, earns its cost.
| Metric | Manual process | Automated workflow |
|---|---|---|
| Review time per vendor | Hours of back-and-forth email | Around 15 minutes of review |
| Document completion rate | Inconsistent, often stalls | most vendors in one automation case study |
| Follow-up method | Ad hoc reminders | Scheduled escalation sequence |
Track time-to-W-9 and completion rate monthly. If either one is trending the wrong way, that's your signal to tighten the intake sequence before it's a January problem.
TIN Matching, B-Notices, and Year-End Prep
- Run a full bulk TIN match through IRS e-Services in the fourth quarter, before you generate any 1099s. Results on large batches typically come back within 24 hours, giving you time to fix mismatches while vendors are still responsive.
- Document every TIN match run and any remediation steps taken, as this paper trail helps support a reasonable-cause argument if the IRS questions a filing later.
- If a CP2100 or CP2100A notice arrives, re-solicit the W-9 immediately, in writing, and track the response window. A second unanswered notice on the same vendor is when backup withholding starts to apply, currently at 24% of payments.
- Re-verify vendor records annually and any time a name, EIN, or entity structure changes; a stale W-9 is a liability sitting quietly in your files.
Who Owns Onboarding, and How to Keep It Clean
Someone specific has to own this, not "the AP team" in the abstract. Assign one person as the intake gatekeeper, with a clear handoff to a controller or fractional CFO for anything unusual, like a vendor claiming exemption without documentation.
A short recurring routine keeps records honest:
- Run a duplicate-vendor search quarterly, checking for near-identical names.
- Check certificate of insurance expiration dates if your vendor agreements require coverage.
- Flag any vendor whose name or EIN has changed since intake for re-verification.
- Run the Q4 bulk TIN match without exception, every year, on the same schedule.
Write the whole thing down as a one-page standard operating procedure: intake, validate, approve, activate, annual review. If it's not written down, it depends on one person remembering, and that person eventually takes a vacation.
Why the Payment Gate Approach Actually Works
Most vendor onboarding advice treats compliance as paperwork to finish eventually. That framing is backwards. The moment a payment goes out the door, your leverage to get a W-9 disappears, because the vendor has already gotten what they wanted.
AmCFO builds onboarding around that one insight: make the document the condition of the payment, not a follow-up task. Teams that adopt this sequence consistently report the same result, a January that involves reviewing completed files instead of chasing six vendors who never sent anything back.
How AmCFO Helps You Build This Into Your Books
You don't have to build this system alone, and honestly, most finance teams shouldn't try to bolt it onto QuickBooks without help. AmCFO handles the parts that turn a good checklist into a working system: QuickBooks setup and cleanup so vendor records are configured correctly from day one, ongoing bookkeeping so the "track 1099" box and remittance details never drift out of sync, and fractional CFO work to design the actual approval controls behind your payment gate.

The payoff is concrete: less 1099 risk, no January scramble reconstructing vendor files from memory, and AP staff spending time on exceptions instead of chasing paperwork. If your vendor files are already a mess of duplicates and missing W-9s, a fractional CFO engagement can map out the fix in a single working session. Reach out to AmCFO and get a plan for cleaning up vendor onboarding before your next filing deadline arrives.
Resources for Implementing These Controls
- Instructions for the Requester of Form W-9: the IRS's own rules on electronic collection and TIN matching.
- Set contractors to track 1099s in QuickBooks: step-by-step vendor profile configuration.
- The client onboarding checklist for service professionals: intake form patterns that translate directly to vendor records.
Frequently Asked Questions
What's the difference between vendor onboarding and the invoice approval workflow? Vendor onboarding happens once, when you first add a vendor and collect their W-9 and payment details. The invoice approval workflow runs every time that vendor bills you, routing each invoice through coding and sign-off before payment.
Do I need a W-9 from every vendor, even small one-time purchases? You need one from any vendor you'll pay $600 or more to in a calendar year for services, unless they're a corporation. Collecting it at intake, before you know the total, avoids chasing it later.
Can I onboard a vendor without a completed W-9 if I need something urgently? You can, but you're taking on backup withholding risk and CP2100 exposure if the vendor later refuses to provide one. Holding the first payment until the form clears is the safer standard.
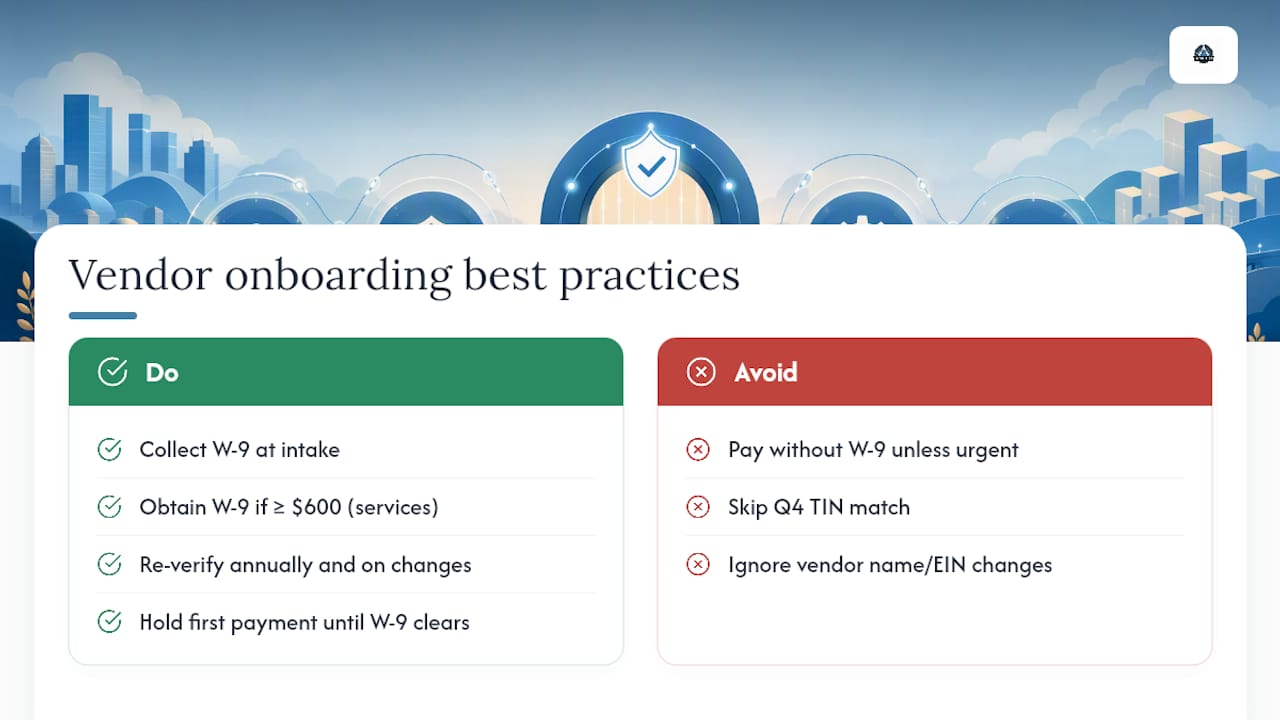
How often should I re-verify existing vendor records? Annually at minimum, plus any time a vendor reports a name or EIN change. Pair that review with your Q4 bulk TIN match so both happen on a predictable schedule.
Sources
- Set contractors to track 1099s in QuickBooks
- Instructions for the Requester of Form W-9 (IRS)
- Collecting W-9s and avoiding backup withholding: a vendor-onboarding playbook